Do you want to disable directory browsing in WordPress?
Directory browsing can put your site at risk by showing important information to hackers which can be used to exploit vulnerabilities in your site’s plugins, themes, or even your hosting server.
In this article, we will show you how you can disable directory browsing in WordPress.
What Does Disabling Directory Browsing in WordPress Do?
Every time someone visits your website, your web server will process that request.
Usually, the server delivers an index file to the visitor’s browser, such as index.html. However, if the server can’t find an index file, then it may show all the files and folders in the requested directory instead.
This is directory browsing, and it’s often enabled by default.
If you’ve ever visited a site and seen a list of files and folders instead of a webpage, then you’ve seen directory browsing in action.
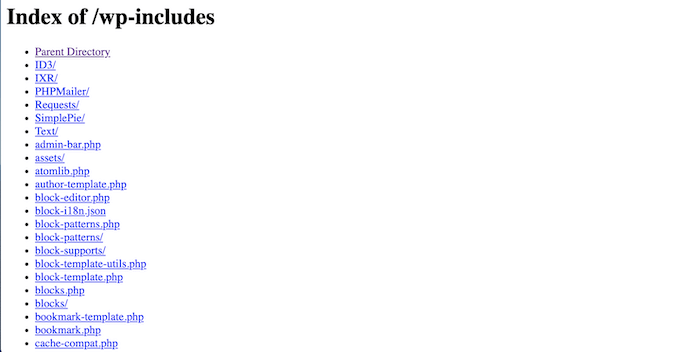
The problem is that hackers can use directory browsing to see the files that make up your website, including all the themes and plugins that you’re using.
If any of these themes or plugins have known vulnerabilities, then hackers can use this knowledge to take control of your WordPress blog or website, steal your data, or perform other actions.
Attackers may also use directory browsing to look at the confidential information inside your files and folders. They might even copy your website’s contents, including content that you would usually charge for such as ebook downloads or online courses.
This is why it’s considered a best practice to disable directory browsing in WordPress.
How to Check is Directory Browsing is Enabled in WordPress
The easiest way to check whether directory browsing is currently enabled for your WordPress website is by simply visiting the /wp-includes/ folder link like this: https://ift.tt/HYdtOFU.
You’ll want to replace www.example.com with your website’s URL.
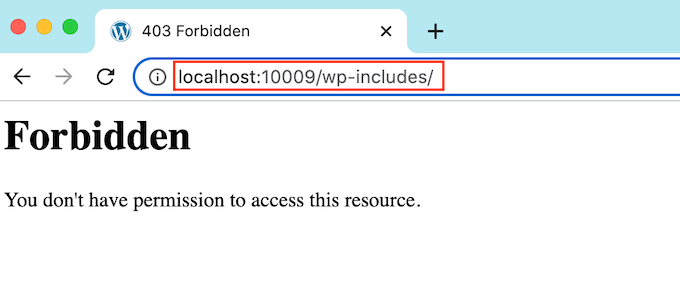
If you get a 403 Forbidden or similar message, then directory browsing is already disabled on your WordPress website.
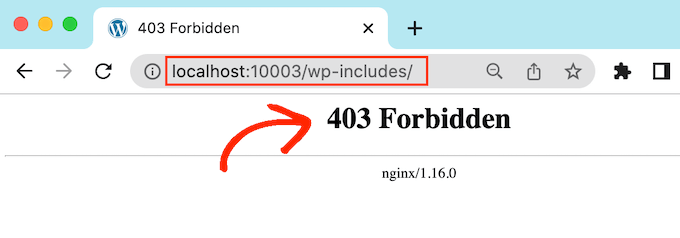
If you see a list of files and folders instead, then this means that directory browsing is enabled for your website.

Since this makes your website more vulnerable to attack, you’ll typically want to block directory browsing in WordPress.
How to Disable Directory Browsing in WordPress
To disable directory listing, you’ll need to add some code to your site’s .htaccess file.
To access the file, you’ll need an FTP client, or you can use the file manager app inside your WordPress hosting control panel.
If this is your first time using FTP, then you can see our complete guide on how to connect to your site using FTP.
After connecting to your site, simply open your website’s ‘public’ folder and find the .htaccess file. You can edit the .htaccess file by downloading it to your desktop and then opening it in a text editor like Notepad.
At the very bottom of the file, simply add the following code:
Options -Indexes
It will look something like this:
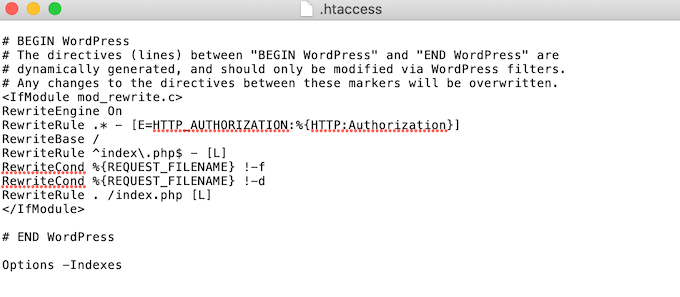
Once you’re done, save your .htaccess file and upload it back to your server using an FTP client.
That’s it. Now if you visit the same https://ift.tt/nG3ONvX URL, you’ll get a 403 Forbidden or similar message.
We hope this article helped you learn how to disable directory browsing in WordPress. You may also want to see our ultimate WordPress security guide, or see our expert pick of the best WordPress membership plugin to protect your files.
If you liked this article, then please subscribe to our YouTube Channel for WordPress video tutorials. You can also find us on Twitter and Facebook.
The post How to Disable Directory Browsing in WordPress first appeared on WPBeginner.

No comments:
Post a Comment