Do you want to learn how to do live blogging in WordPress?
Live blogging is a form of blogging that lets you cover live events and provide updates to your readers in real time.
In this article, we’ll show you how you can add live blogging to your WordPress site, step by step.

Why Do Live Blogging in WordPress?
Live blogging is when you create a single blog post and add real time updates during an event. This lets you add new content as the event unfolds, while keeping all the updates in a central place.
Bloggers and news sites commonly use it to broadcast real time updates from technology conferences, sports events, and across other blogging niches.
For example, if you run a crossfit gym you could provide real time live blogging coverage of the crossfit games.
Or, if you run a gaming website, you could provide real time blogging for eSports matches and other events.
Live blogging is a fun way to engage your readers and keep them coming back to your website for updates.
That being said, let’s show you how you can do live blogging on your WordPress site, step by step.
Install and Setup the Live Blogging Plugin
You could do live blogging in WordPress by manually editing a blog post every time you want to add an update.
However, if you live blog often, we recommend using the 24liveblog plugin. This free plugin lets you add real-time live blogging to your site easily.
24liveblog offers a forever-free plan that includes features like social media integration, real-time statistics, audio and video recording, and much more.
First thing you need to do is install and activate the 24liveblog plugin. For more details, see our beginner’s guide on how to install a WordPress plugin.
After that, navigate to Settings » 24liveblog and then click the ’24liveblog’ link at the bottom of the sign up box.
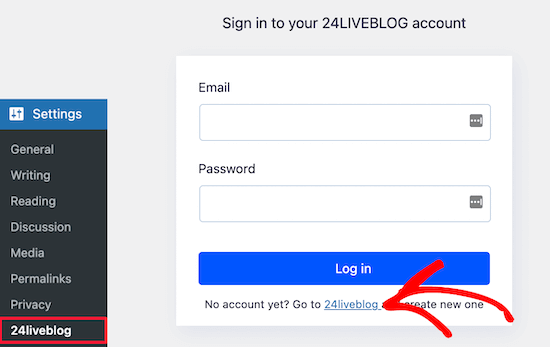
This brings you to the sign in page on 24liveblog’s website.
You need to click the ‘Get started’ link at the bottom of the screen to create an account.
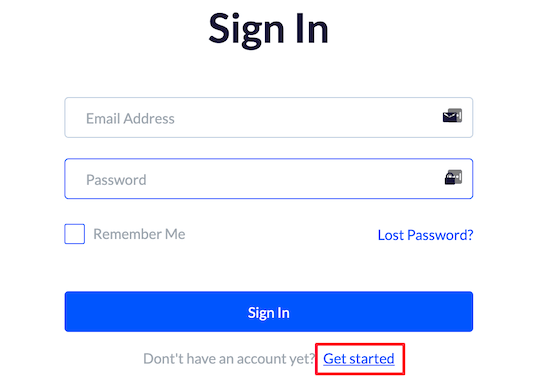
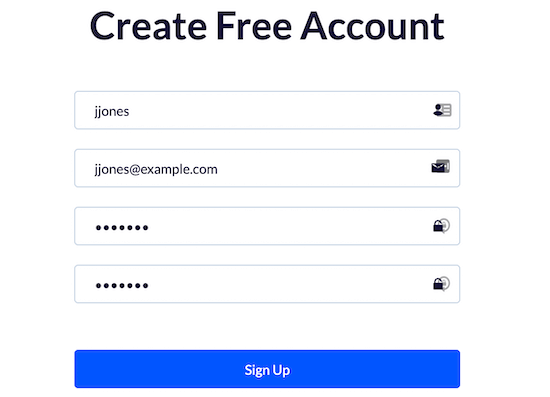
Next, you need to enter a user name, email address, and password.
Then, click the ‘Sign Up’ button.
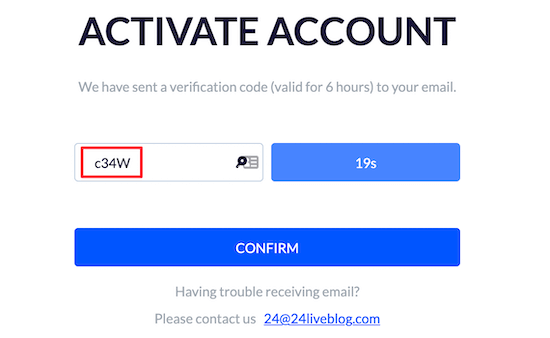
Once you’ve done that, you need to activate your account.
Simply enter the code from your email and then click the ‘Confirm’ button.
After that, you can go back to Settings » 24liveblog in your WordPress dashboard and enter your email and password.
Then, click the ‘Log in’ button.
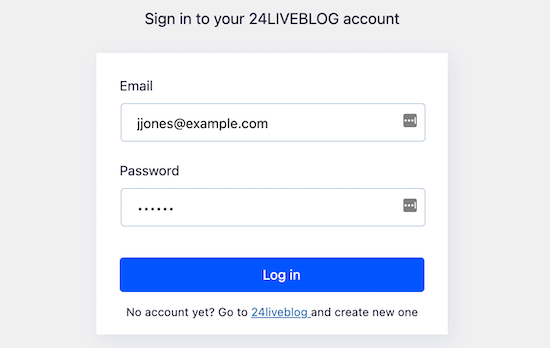
Now you’ve successfully connected your WordPress blog and the 24liveblog platform.
Add a New WordPress Blog Post for Live Blogging
Next, you need to create a blog post where you’ll embed your live blog.
To do this, go to Posts » Add New and then enter the name of your blog post.
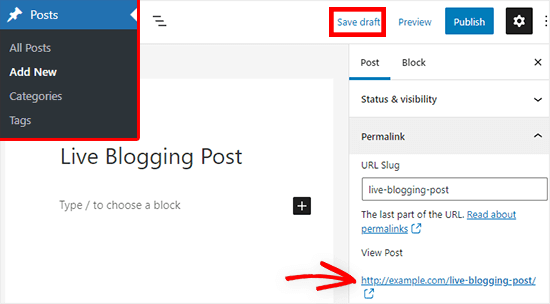
Click the ‘Save Draft’ link at the top right.
Then, under the Permalink tab in the right-hand menu, make note of the blog post URL. You’ll need to enter this later in your live blog event details.
Create Your First Live Blog Event
Now head over to your account page on the 24liveblog website and click the ‘Create Event’ button.

This brings you to a screen where you can choose the type of event.
Simply click on the ‘Live Blog’ box.

Here you can enter your event details.
You need to give your event a title, select the time, and choose a category.
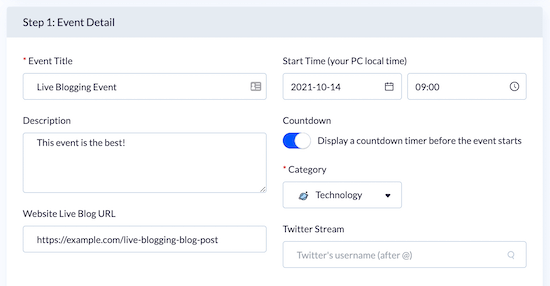
You can also add a description for your event and enter the URL for the blog post you created earlier.
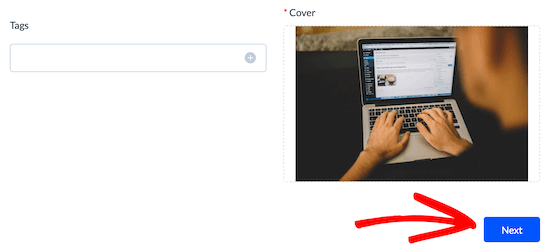
Then, add a cover image for the event and click the ‘Next’ button.
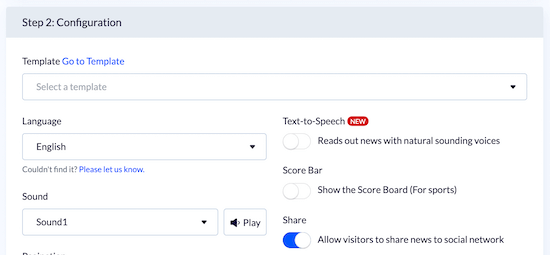
On the next screen, you’ll find all kinds of options for visitor interaction.
For example, you can enable a countdown timer, real time sports score updates, and more.
You can choose to customize these as you like to suit your event, and then click the ‘Next’ button to continue.
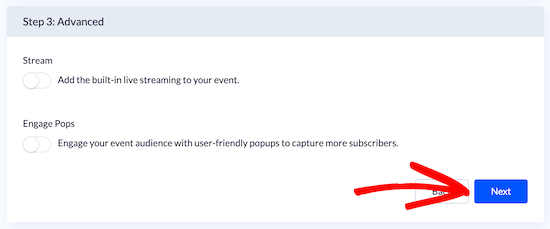
On the next screen, you can choose to turn on live streaming and popups to grow your email list, but we’ll leave the default settings.
Then, click the ‘Next’ button at the bottom.
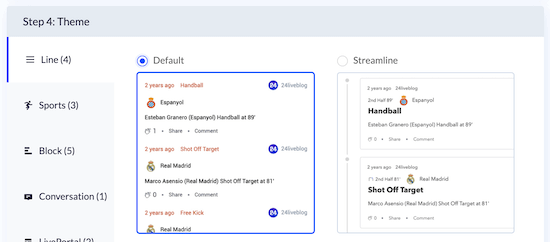
After that, you can choose a theme. This changes the style of your live blogging stream on your website.
We’ll use the ‘Default’ time. However, you can choose the theme that works best with your event.
To choose a new theme, all you have to do is click on it.
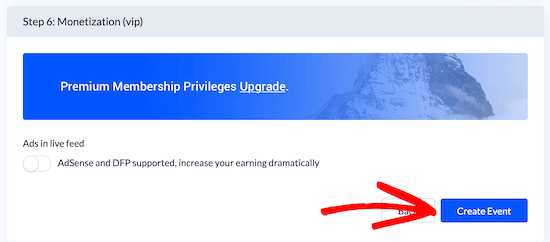
Then, click the ‘Next’ button at the bottom of the page. On the next screen, simply click ‘Next’ one more time.
After that, you’ll be taken to the final screen, where you need to click the ‘Create Event’ button.
Add the Live Blogging Feature to Your WordPress Blog Post
Now, you need to add the 24liveblog block to the blog post you created earlier.
Simply open up the blog post, then click the ‘Plus’ add block button.
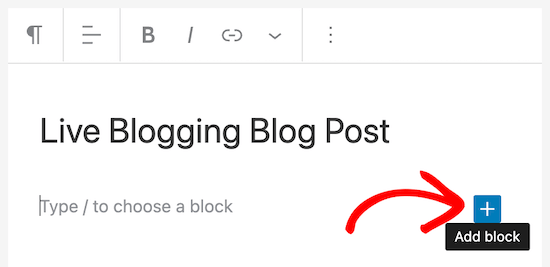
Next, type ’24liveblog’ into the search bar.
Then, click the ’24liveblog’ block.
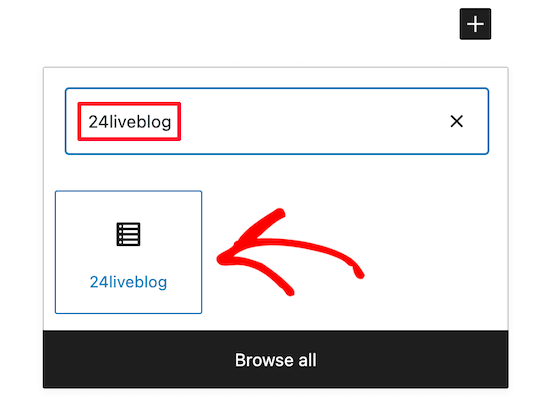
This will automatically add live blogging functionality into your blog post.
After that, click the ‘Select Liveblog’ button.
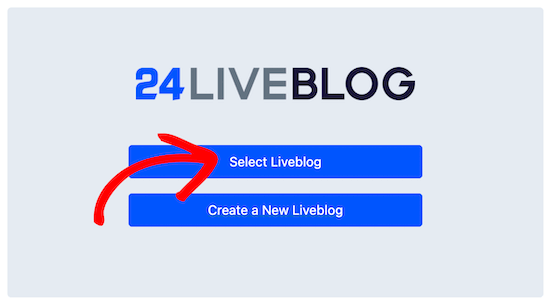
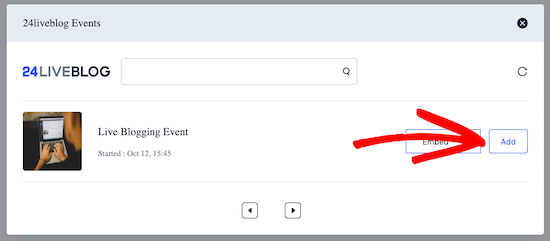
This brings up a popup that will list all of the events you have created.
Simply find your event and then click the ‘Add’ button.
You can continue to add more text and other elements to your post.
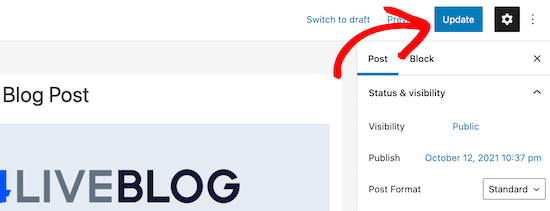
Once you’re finished, click the ‘Update’ or ‘Publish’ button to make your post live.
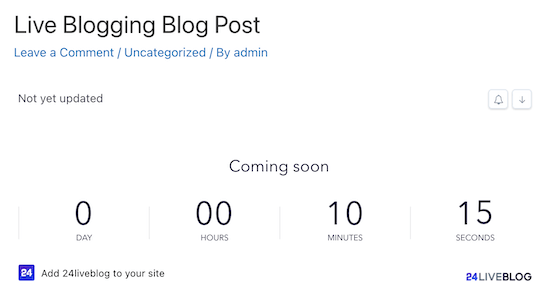
You can view your post even when the live blogging event hasn’t started.
If you enabled a countdown timer when setting up your event, then you’ll see the timer now.
When it’s time for your event to begin, simply open up your blog post in your post editor.
Then, click the ‘View’ button.
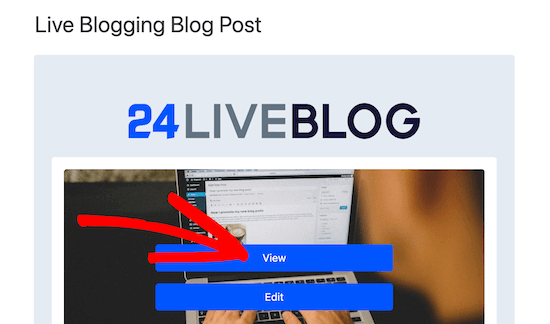
This will take you to your account on the 24liveblog website.
Here you can blog in real time, and your content will automatically be added to the live blogging post on your website.
Simply enter your post content and then click the ‘Add Post’ button.
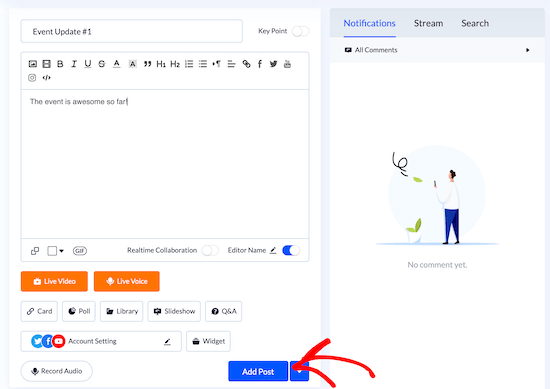
You can also record live audio and add video and images to your post.
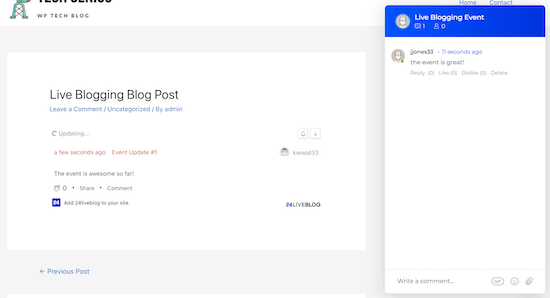
Your visitors can comment on each event update you publish and also chat with each other in the live chat window.
If you want to add an events calendar to your site that shows all of the live blogging events you’re hosting, then see our guide on how to create a simple event calendar with Sugar Calendar.
We hope this article helped you learn how to do live blogging in WordPress. You may also want to see our guide on how to get a free email domain and our comparison of the best AI chatbots software for your website.
If you liked this article, then please subscribe to our YouTube Channel for WordPress video tutorials. You can also find us on Twitter and Facebook.
The post How to Do Live Blogging in WordPress (Step by Step) appeared first on WPBeginner.


No comments:
Post a Comment