Are you looking for a way to use your Microsoft Outlook account to send emails from your WordPress website?
Connecting Microsoft Outlook with WordPress helps improve email deliverability by making sure that your emails reach your subscriber’s inbox, even if you’re sending a lot of them.
In this article, we’ll show you step by step how to connect Microsoft Outlook to WordPress.
Why Use Microsoft Outlook to Send WordPress Emails?
Using Microsoft Outlook is a great option for business owners who regularly use Office 365. You can use your existing account to send emails to your subscribers from your WordPress website.
The best part about using Outlook is that it allows you to send a lot of emails at once. You can send up to 10,000 emails per minute, which is a much higher limit than other mailing services.
If you have a busy online store, then this will help you with sending receipts, tracking info, and abandoned cart emails to all your customers.
Another benefit that Microsoft Outlook provides is that you don’t have to use the default WordPress PHP mail() function to send emails.
There are many issues with the default mailing method. Many WordPress hosting services don’t have PHP mail properly configured, which leads to email deliverability problems.
Your emails can end up in the spam folder because email service providers like Gmail can’t detect where the email is coming from.
However, you can easily overcome this issue by using an SMTP service provider to send emails in WordPress through your Outlook account.
What is SMTP?
SMTP or Simple Mail Transfer Protocol is an industry-standard technology for sending emails.
It uses proper authentication, ensuring that your emails reach the inbox of your users and don’t end up in the spam folder.
You can connect popular services like Microsoft Office 365, G Suite (Gmail), SMTP.com, SendinBlue, or Amazon SES to send your emails.
That being said, let’s see how you can connect your Microsoft Outlook account to WordPress.
Connect Outlook to Your WordPress Site
The easiest way to add Microsoft Outlook to WordPress is by using the WP Mail SMTP plugin. It lets you securely use the Microsoft API to authenticate your site’s email.
For this tutorial, we will be using the WP Mail SMTP Pro version because it includes Office 365 / Outlook.com integration.
There is also a free version of WP Mail SMTP that has 6 integrations, but it doesn’t have the feature to connect your Outlook account with WordPress.
First, you will need to install and activate the WP Mail SMTP plugin on your WordPress website. You can refer to our step-by-step guide on how to install a WordPress plugin.
Note: An important thing to remember is that the Outlook mailer will only work if you have an SSL certificate on your website. You can check out our guide on how to set up SSL on a WordPress site.
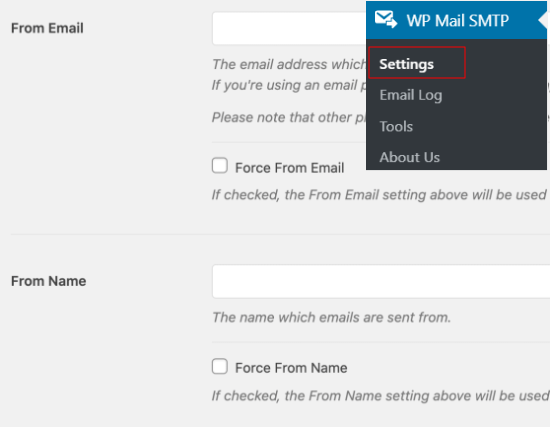
Upon activation, you can connect your Outlook account by going to WP Mail SMTP » Settings from your WordPress admin area.
On the settings page, you’ll see the ‘From Email’ and ‘From Name’ settings options. You can skip these settings as your Outlook account’s settings will override them.
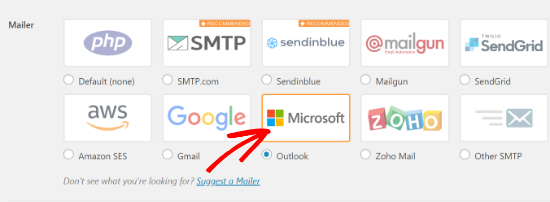
Below that, you’ll see different options next to the Mailer settings. Go ahead and select ‘Outlook’ as your Mailer option.
Next, WP Mail SMTP will show a new section with settings for your Outlook account.
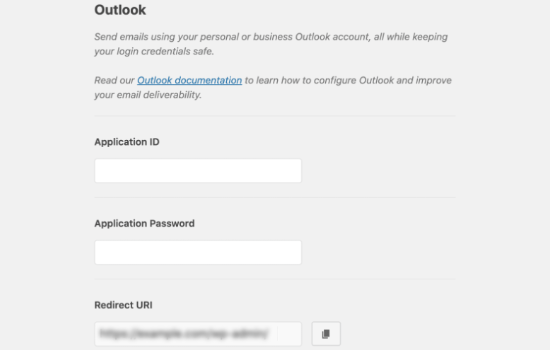
To find the Application ID, Application Password, and Redirect URI, you’ll need to create a web application within a Microsoft Azure account. Don’t worry, we’ll walk you through how to do this step by step.
We recommend that you keep the WP Mail SMTP Outlook settings open in a separate tab or window, as you’ll need to return to this page to enter the information.
You can use your existing Microsoft email account (Live, Outlook, Hotmail, Office 365, etc.) to log into Microsoft Azure. Keep in mind that if you do so, then all your WordPress emails will be sent from that email address.
If you don’t have a Microsoft Outlook account, or if you prefer to send from a different email address, then you can go to the Microsoft Azure website and create your account. Just make sure that the account you create includes the permissions to send emails.
The account is free to create, and you don’t need any paid services to set up the mailer. However, Microsoft will ask you to enter your credit card information to reduce spam signups.
After that, you can log into the Microsoft Azure Portal using the email address you want to use.
Create an Application ID
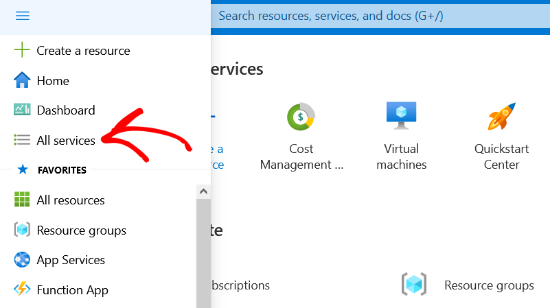
Once you have opened the Azure Portal, go ahead and click the ‘All Services’ option from the sidebar on your left.
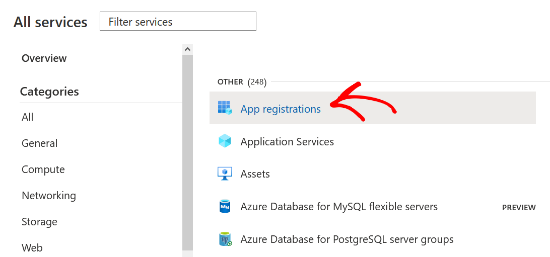
On the next screen, you’ll see different services offered by Microsoft Azure. You can scroll down to the ‘Other’ section and click on the ‘App registrations’ option.
After that, you’ll need to click the ‘+ New Registration’ button to create your application.

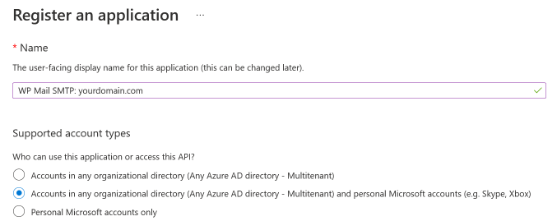
Now, enter a name for your application. This is for your own use, so you can change the name whenever you want. For example, you can name it something like ‘WP Mail SMTP: yourdomain.com.’
As for the ‘Supported account types’ section below, it is a best practice to select the ‘Accounts in any organizational directory (Any Azure AD directory – Multitenant) and personal Microsoft accounts (e.g. Skype, Xbox)’ option.
However, if you don’t see this option under your account types, then you can also select the ‘Accounts in any organizational directory (Any Azure AD directory – Multitenant)’ option.
After that, scroll down to the Redirect URI settings. You can leave the dropdown settings to Web for the first field in the form.

For the second field, you will have to enter the redirect URI address given in the WP Mail SMTP Outlook settings.
To find the Redirect URI, simply return to the WP Mail SMTP settings tab or window from your browser. Then copy the web address that is given in the Redirect URI field.
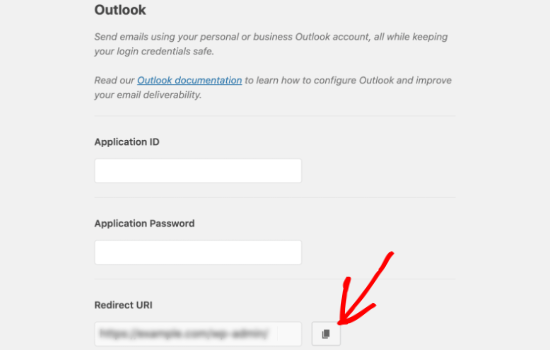
Next, you can paste the URL into the Microsoft Azure app registration form and click the Register button.

Microsoft Azure will now take you to another screen where you’ll see the Application (client) ID. Simply click the ‘Copy to clipboard’ button to copy your application ID.
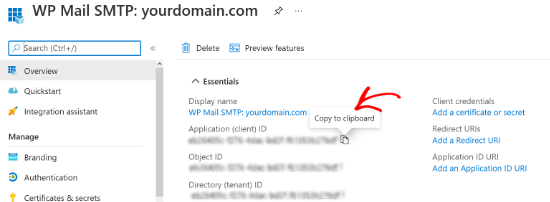
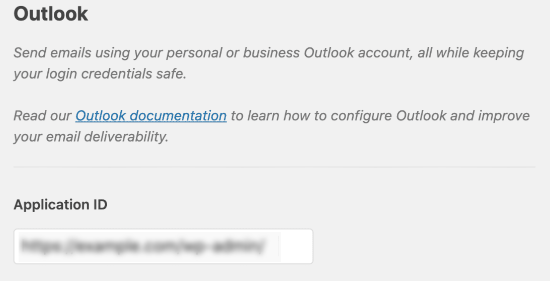
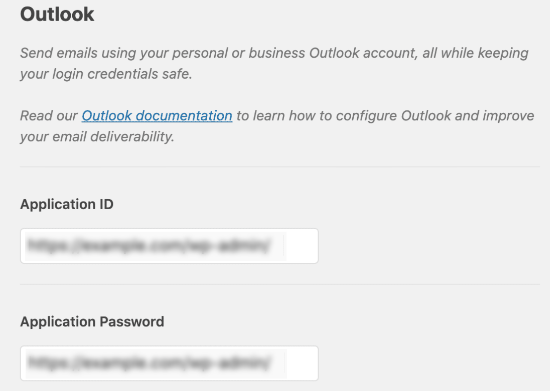
After that, you can enter the copied application ID in the WP Mail SMTP settings. To do that, simply head over to your WP Mail SMTP settings window and paste the value in the Application ID field.
Create an Application Password
Once you have entered the application ID, the next thing to do is create an application password.
You can start by clicking the ‘Certificates & secrets’ option in the sidebar on your left.
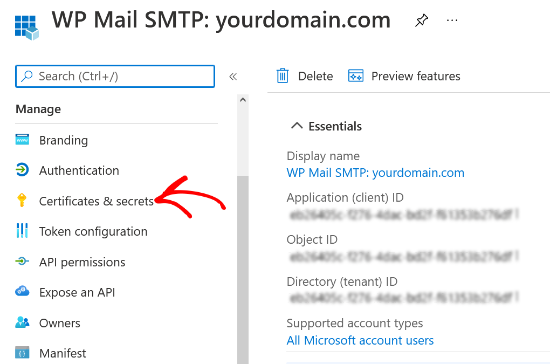
On the next screen, you can skip the Certificates section and scroll down to the Client Secrets section. Then click the ‘+ New client secret’ option to add a client secret.

You’ll now see a new overlay window slide in from the right. In this window, you can enter a description and select a time period for the app password to expire.
Microsoft Azure lets you select a preset expiry time (3 months, 6 months, 12 months, etc.), or you can set a custom timeframe.
We recommend selecting one of the preset settings when you are first starting out. You can always change the password expiry time to custom settings in the future.
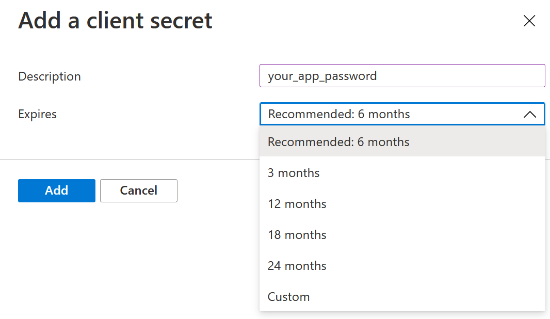
When you are satisfied with the settings, click the Add button.
As soon as you click the Add button, Microsoft Azure will generate an application password. You can go ahead and click the ‘Copy to clipboard’ button to copy the password that is given under the Value column.

Next, you’ll need to enter this password in your WP Mail SMTP settings. To do that, return to the WP Mail SMTP settings and then paste the password under the Application Password field.
Set Up API Permissions
After setting up the Application ID and Application Password in WP Mail SMTP, the next step is to add API permissions.
To get started, you can click on the API permissions option from the menu on your left.
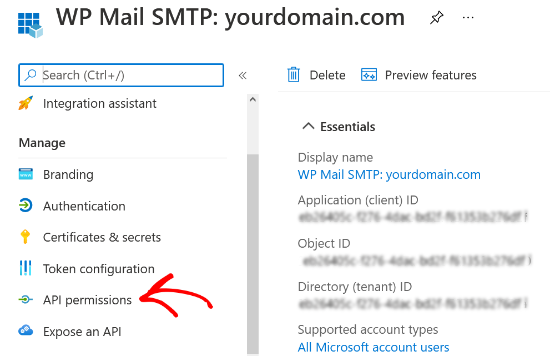
Next, go ahead and click the ‘Add a permission’ button.

When you click the button, a new window will slide in from the right to request API permissions. You’ll have to select the Microsoft Graph option to set up API permissions.
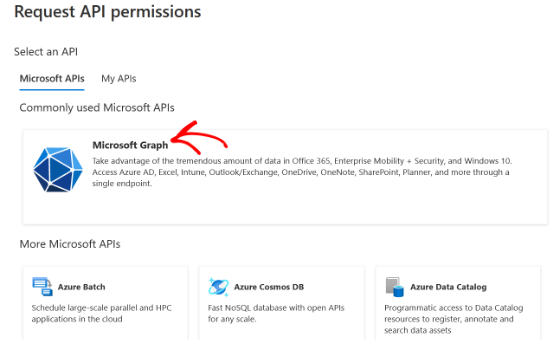
On the next screen, Microsoft Azure will ask what type of permissions does your application requires. You can select the ‘Delegate permissions’ option.

Next, you’ll see multiple options to select permissions. However, an easier way to find the right settings is by entering the term ‘send’ in the search bar located under the ‘Select permissions’ heading.
After that, you’ll have to select the Mai’ tab from the options that appear and then click the checkbox for Mail.Send.Shared.
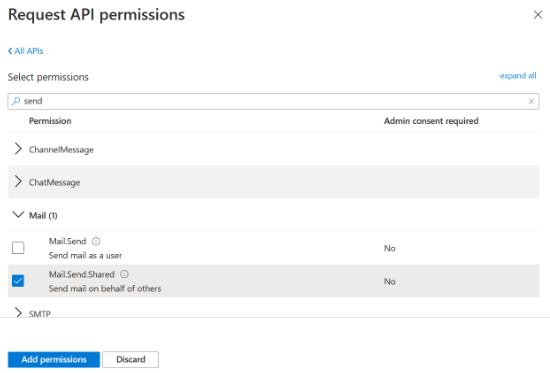
When you are ready with the settings, click the ‘Add permissions’ button at the bottom.
You’ll have to repeat the API permission steps again by clicking on the ‘+ Add a permission’ button and again selecting ‘Microsoft Graph.’ However, this time select the ‘Application permissions’ option.

Now, you can enter the same search term ‘send’ in the Select permissions search bar. When you see the Mail tab, click on it and then select the checkbox for Mail.Send.

Next, go ahead and click the ‘Add permissions’ button.
After setting up the API permissions, you’ll have to go back to the WP Mail SMTP settings and then click the Save Settings button to finish up the Outlook mailer configuration.
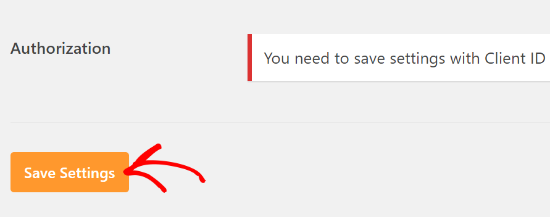
When you save the settings, you’ll have to scroll down to the Authorization section in the WP Mail SMTP settings and click the ‘Allow plugin to send emails using your Microsoft account’ button.

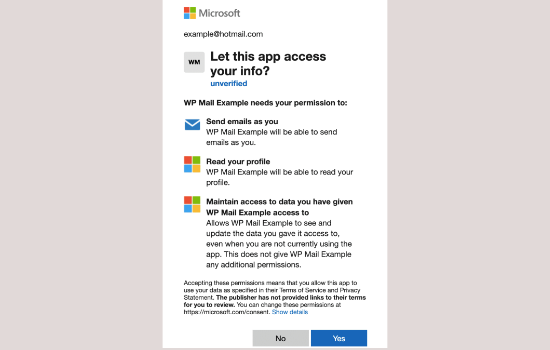
As soon as you click the button, you’ll be redirected to the Microsoft permissions form. All you have to do is click the Yes button at the bottom. This will allow WP Mail SMTP to connect to your Microsoft account.
After that, you will be redirected back to the WP Mail SMTP settings page, and a notice will appear at the top showing that you are ready to send emails through Outlook.

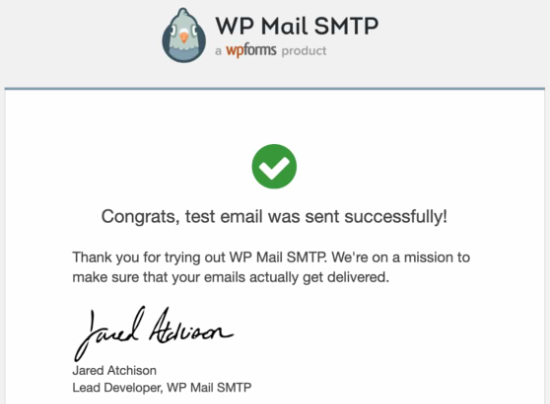
You can now send a test email to check if everything is working properly.
To send a test email, simply go to WP Mail SMTP » Settings and then click on the Email Test tab at the top. When you are satisfied with the settings, just click the Send Email button at the bottom.

After sending the email, you can go to your inbox and check whether you received the test email.
We hope this article helped you learn how to connect Microsoft Outlook to WordPress. You may also want to check out our comparison of the best email marketing services for small businesses, and our complete guide on how to add web push notifications in WordPress.
If you liked this article, then please subscribe to our YouTube Channel for WordPress video tutorials. You can also find us on Twitter and Facebook.
The post How to Connect Microsoft Outlook to WordPress (Step by Step) appeared first on WPBeginner.

No comments:
Post a Comment