Do you want to display your business hours on your WordPress site?
Displaying your open hours on your website can help customers plan their visits accordingly. With location search growing every day, this helps grow your business.
In this article, we’ll show you how to add your business opening hours in WordPress. .

Why Add Business Hours to Your WordPress Site?
Adding business hours to your WordPress website helps customers find out when you’ll be open for business. More importantly, it also helps you appear in local search results.
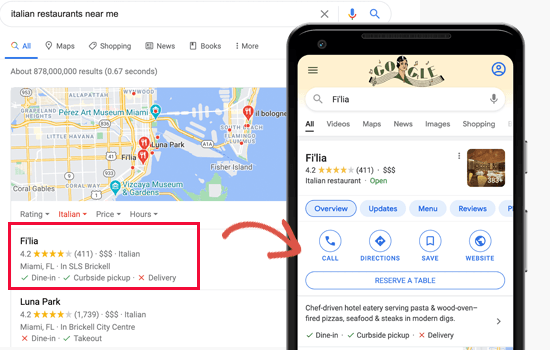
Nearly 46% of all searches on Google have local intent. For businesses, these searches are highly valuable as they bring in customers already looking for the products and services they offer.
Users can see your open hours on your website as well as search results. This helps them make a purchase, visit your store, restaurant, or office.
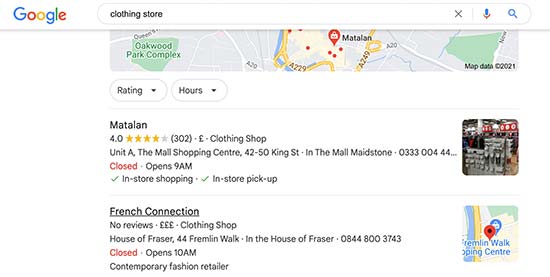
That being said, Let’s take a look at how to properly add your business hours in WordPress.
Method 1. Adding Business Hours in WordPress using All in One SEO
This method is easier and recommended for all users.
It gives you more control over how your website appears in search results. You can easily display your business hours anywhere on your website, and it also the ability for managing multiple locations.
For this method, we’ll be using All in One SEO for WordPress. It is the best WordPress SEO plugin on the market and helps you bring more free traffic from search engines to your website.
Note: You’ll need at least their Plus plan to access the Local SEO feature needed for this tutorial.
First, you need to install and activate the All in One SEO for WordPress plugin. For more details, see our step by step guide on how to install a WordPress plugin.
Upon activation, the plugin will run a set up wizard. Follow the on-screen instructions to set it up. If you need more help, then please take a look at our article on how to set up All in One SEO for WordPress.
Next, you need to visit All in One SEO » Local SEO page to set up your business information.
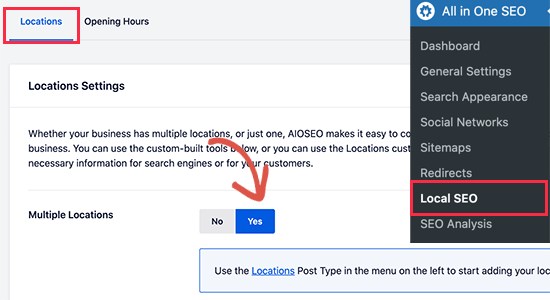
First, you need to switch the ‘Multiple Locations’ toggle to ‘Yes’. You can do this even if you only have one location to add.
After that, switch to the ‘Opening Hours’ tab to enter your business hours. These business hours will be used as default for all locations. You’ll also be able to set different business hours for each location if needed.
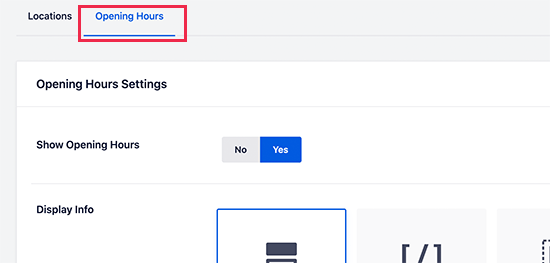
You need to scroll down on the page to provide labels and business hours information. You can set open for 24 hours, or manually set time for each day.
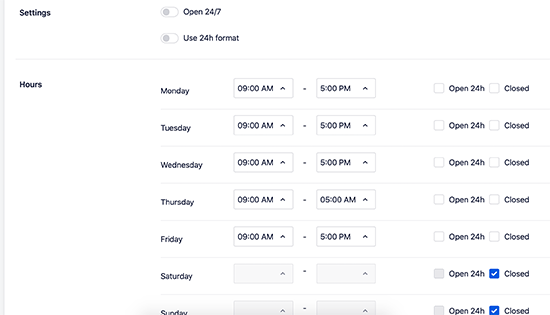
Once finished, click on the ‘Save Changes’ button to store your settings.
Now that we have set up local SEO, let’s add your location information.
You need to start by going to Locations » Add New page to add your location and business information.
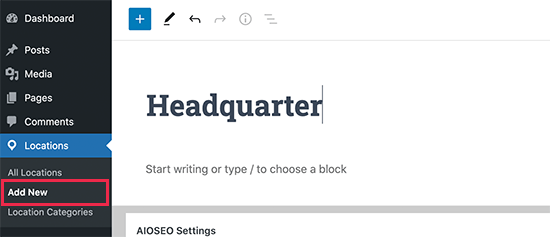
Provide a title for your location and then scroll down to the ‘AIOSEO Local Business’ section.
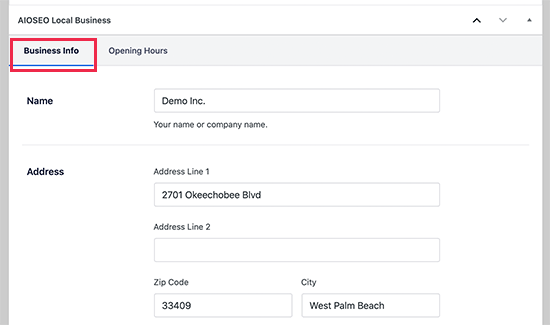
Under the Business Info tab, fill out the form to provide business and location information. You can provide business name, address, phone number, payment methods, area served, and more.
After that, you need to switch to the Business Hours tab. From here, you can add business hours or use the default business hours you entered earlier.
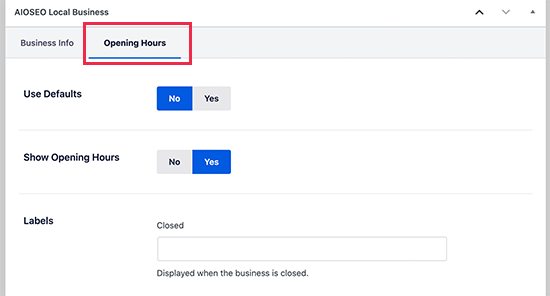
Once you are finished, don’t forget to click on the Publish button to save your location.
You can repeat the process to add more locations if needed.
Display Business Hours information in Post or Page
All in One SEO allows you to easily display business hours anywhere on your website.
It comes with many pre-built WordPress blocks that you can add to any post or page on your site.
Simply edit the post or page and look for AIOSEO blocks. The plugin provides AIOSEO Local Open Hours, AIOSEO Local Business Info, and AIOSEO Local Locations blocks.
You will need to add the ‘AIOSEO Local Open Hours’ block to display business hours.
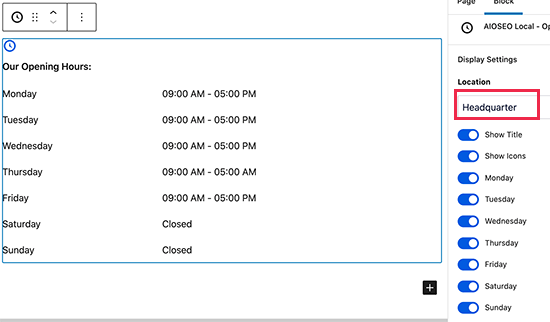
After adding the block, you can select the location you want to display from the block settings.
Don’t forget to click on the Publish / Update button to save your changes.
You can now visit your website to see your business hours displayed on the page.
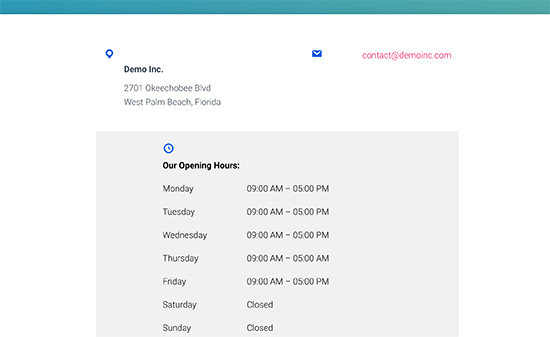
Generally, we recommend adding the business hours on your contact page along with a contact form and your business phone number.
Display Business Hours information in Sidebar
All in One SEO also allows you to easily display business hours in your WordPress sidebar or any widget ready area.
Simply, head over to Appearance » Widgets page and add ‘AIOSEO Opening Hours’ widget to your sidebar.
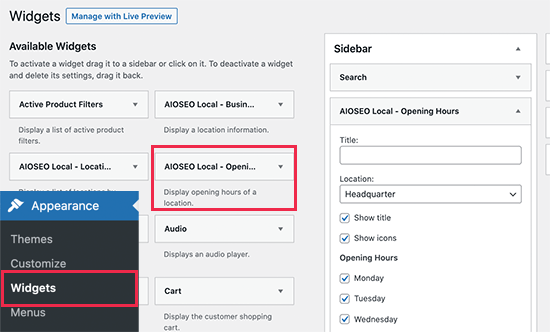
Select a location that you want to display and review the widget settings. Don’t forget to click on the Save button to store your changes.
You can now visit your website to view your business hours in the sidebar.
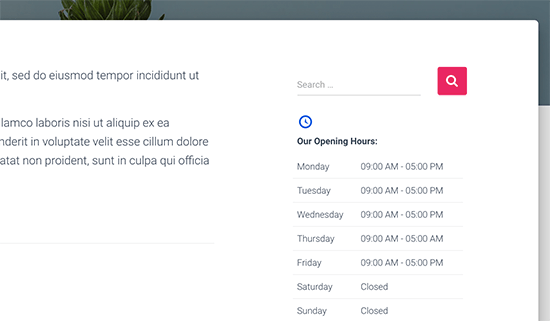
Display Business Hours Anywhere Using Shortcode
All in One SEO for WordPress also allows you to use shortcodes to display business hours anywhere.
Simply add the shortcode [aioseo_local_opening_hours] to display your default business hours.
Alternately, you can also use [aioseo_local_opening_hours location_id="1"] to display any specific location. You can find the location ID by editing the location.
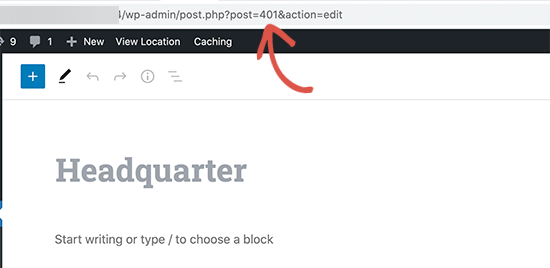
The best part about AIOSEO is that it not only adds your business information in the schema markup code, but it also allows you to display it to users on your website.
Aside from business hours, AIOSEO is a comprehensive SEO plugin that will help you rank higher.
Method 2. Adding Business Hours in WordPress using Business Profile
This method is for users who only want to add business information schema to their WordPress website. It lacks all the other SEO features offered by a comprehensive SEO plugin like All in One SEO.
First thing you need to do is install and activate the Business Profile plugin. For more details, see our step by step guide on how to install a WordPress plugin.
Upon activation, go to Business Profile » Settings page to set up your business profile.
From here, you need to select your business type as Organization and then fill out the other required information.
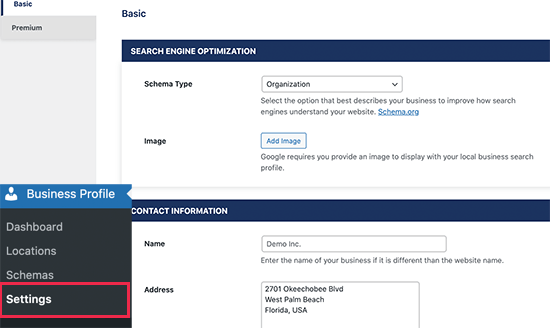
After entering the address information, the plugin will ask you to provide a Google API key with a link to instructions. However, we recommend leaving this field blank.
Below that, you can set your business hours. The plugin also allows you to add multiple sets of schedules, and you can also add exceptions for holidays and special events.
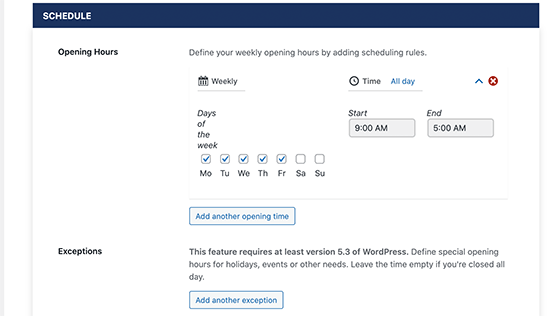
If your business has multiple locations, then you can also turn on the Multiple Locations feature.

Don’t forget to click on the ‘Save Changes’ button to store your changes.
Adding Business Hours in WordPress Using Shortcode
The plugin uses shortcode to display business hours on any page of your WordPress blog or website.
Simply edit the post or page where you want to display the business hours and then add the shortcode [contact-card] .
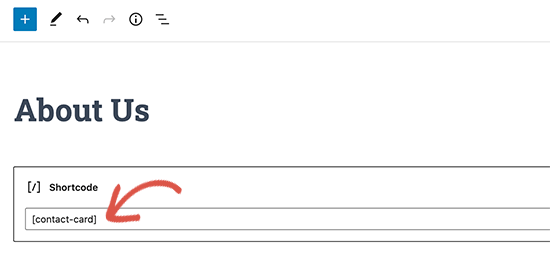
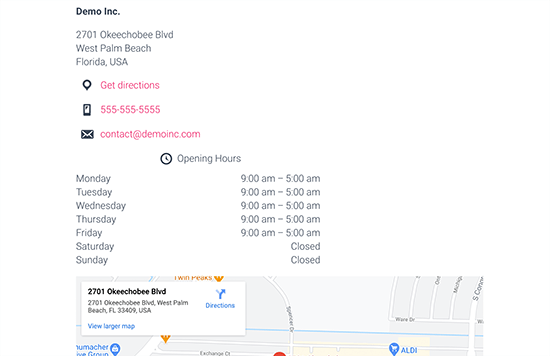
You can now save your changes or publish your page and then preview it. This is how it looked on our test website.
Adding Multiple Locations in Business Profile
The plugin also supports multiple locations. If you have enabled the multiple locations option on the settings page, then you can manage locations by visiting Business Profile » Locations page.
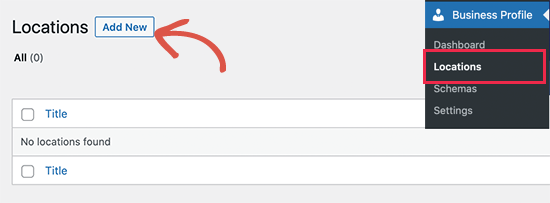
On the next screen, you need to provide a name for your new location and then scroll down to ‘Opening Hours’ box at the bottom.
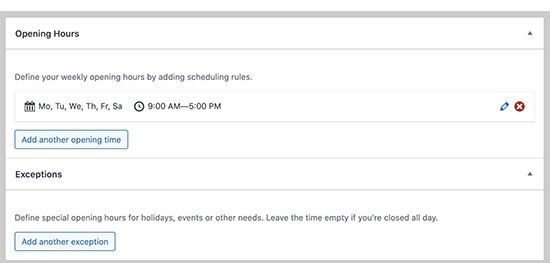
From here, you can add your business hours information.
On the left column, you can add your location information such as address, phone number, email, and more.
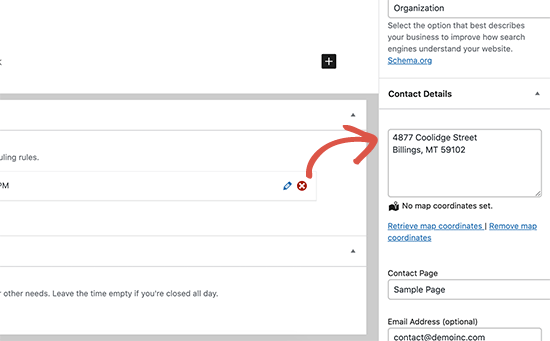
Once you are finished, you can go ahead and ‘Publish’ your location.
Repeat the process to add more locations as needed.
Displaying Multiple Locations in Business Profile
The plugin uses the same shortcode to display any location with business hours.
Simply edit the post or page where you want to display location information. After that, add the shortcode in the following format.
[contact-card location="34"]
Don’t forget to replace location value with your actual location ID. You can find it by editing the location and copying the post id from the address bar.
[
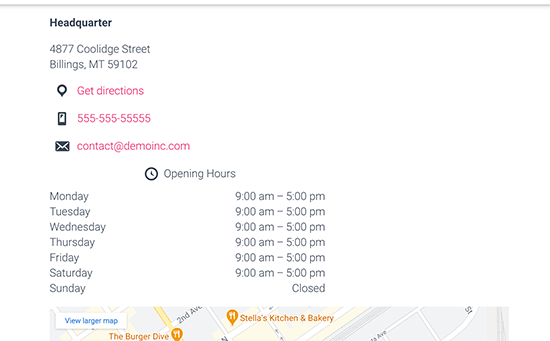
This is how single location information looked on our test website.
Managing Business Information in Google Search Results
Google uses Schema.org Rich Snippets to fetch and display rich search results from your website.
Schema.org is a structured data markup language. It appears in the source code of your website and is not visible to regular visitors.
This helps search engines add additional information in search results, like your business hours and location, review scores, recipe information, and more.
To manage your business information in search results, you should also sign up for a Google My Business account. This helps you add your business location and other information.
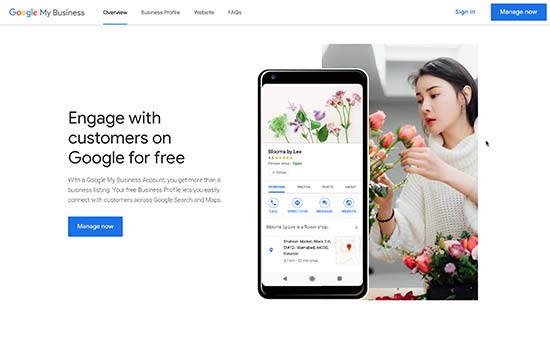
After verification, you’ll be able to provide additional business information and manage its appearance in search, Google Maps, and Places.
Both WordPress plugins that we demonstrated above will help you add the business hour data in SEO-friendly Schema format to your website.
We hope this article helped you add your business hours to your WordPress site. You may also want to see our expert pick of 24 must have WordPress plugins for business websites, and our comparison of the best email marketing services to grow your sales.
If you liked this article, then please subscribe to our YouTube Channel for WordPress video tutorials. You can also find us on Twitter and Facebook.
The post Beginner’s Guide on How to Add Business Hours in WordPress appeared first on WPBeginner.

No comments:
Post a Comment